
How To Add a New Sales Invoice
To create a new invoice, click the ‘Add Invoice’ icon, the following screen will appear (alternatively you can click the ‘Create New’ icon from the header, to the left of the company name “Create New” and select Sales Invoice).
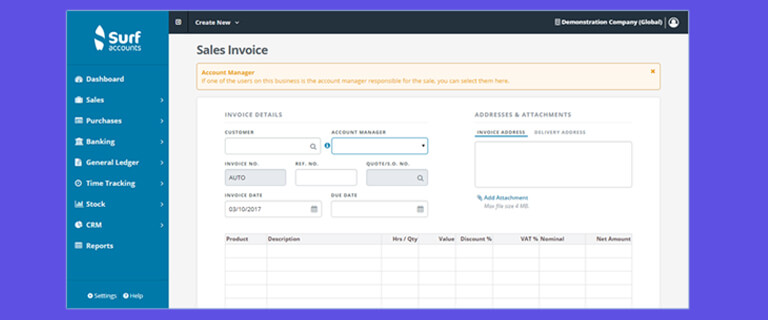
You should start your Invoice by selecting the customer that you are invoicing; you can click on the lookup icon (magnifying glass) to find your customer or type in the customer code if you know it. If the customer doesn’t already exist in the system then you can click the ‘New’ icon in the lookup screen to create the customer.
Once you have selected your customer then some of the other fields will be filled i.e. the customers’ address, as invoice address. The ‘Invoice No.’ may say ‘AUTO’ in which case you do not need to do anything as this is being generated by the system automatically. You can then fill in the ‘Ref. No’, the date of the invoice, the due date will be automatically generated but this can be changed, the account manager within your organisation and separately if there is a different delivery address you can enter that also. You can also attach to your invoice any documentation you want e.g. your customer’s email placing order.
There are some information icons on the screen. If you hover over the Info icon between the customer field and the account manager field then you will see the ‘Credit Control Information’ for the selected customer and if you hover over the ‘Info’ icon beside the VAT heading you will see the Net/VAT/Gross split/summary for the invoice.
In the middle section of the screen (the table) you can add each of the products you are invoicing for, you can select your product by clicking on the lookup icon and selecting from the list or enter your product code if you already know it. If the product doesn’t already exist in the system then you can click the ‘New’ icon in the lookup screen to create the product.
Work your way across the screen, enter the quantity, the price will appear from the product setup, you can change this if you are invoicing at a different price this time, the discount rate (if any), the VAT code will appear from the product setup (to change this click the down arrow at the far right of the row and select ‘Advanced’), the nominal code will appear also based on the product setup (to change this click the down arrow at the far right of the row and select ‘Advanced’.
The net amount should then be calculated based on the price/quantity/discount then you can tab down to the next line to enter the next product (if required), the table is initially set up for 5 products, to add additional lines click the ‘Add a Line’ icon or continue to tab at the end of line 5.
If you selected a product incorrectly you can delete that line (once you are on that line) by clicking the inline submenu and selecting ‘Delete’.